The Forms and Checklists feature allows you to build custom forms and checklists for your locations to complete. Forms can be as simple as a quick inspection checklist or as detailed as a multi-step workflow with conditional questions, attachments, signatures, and work order creation, all from a single submission.
Table of Contents |
Creating a Form
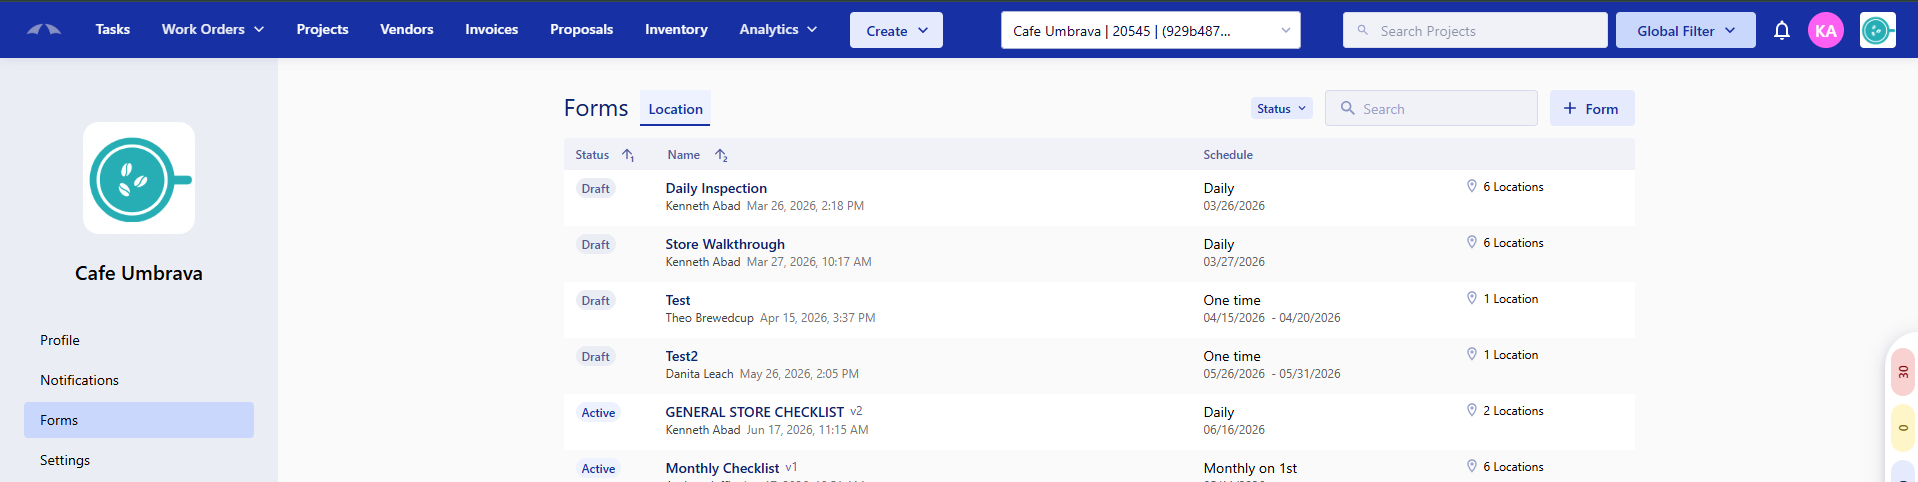
To create a new form, navigate to the company profile, and select the Forms option on the left navigation bar then click Create Form.
The first step in form creation is to name your form. Then you set the frequency of how often the form needs to be completed, and how soon the form would need to be completed. Finally, select the locations that you want to have the form completed at.
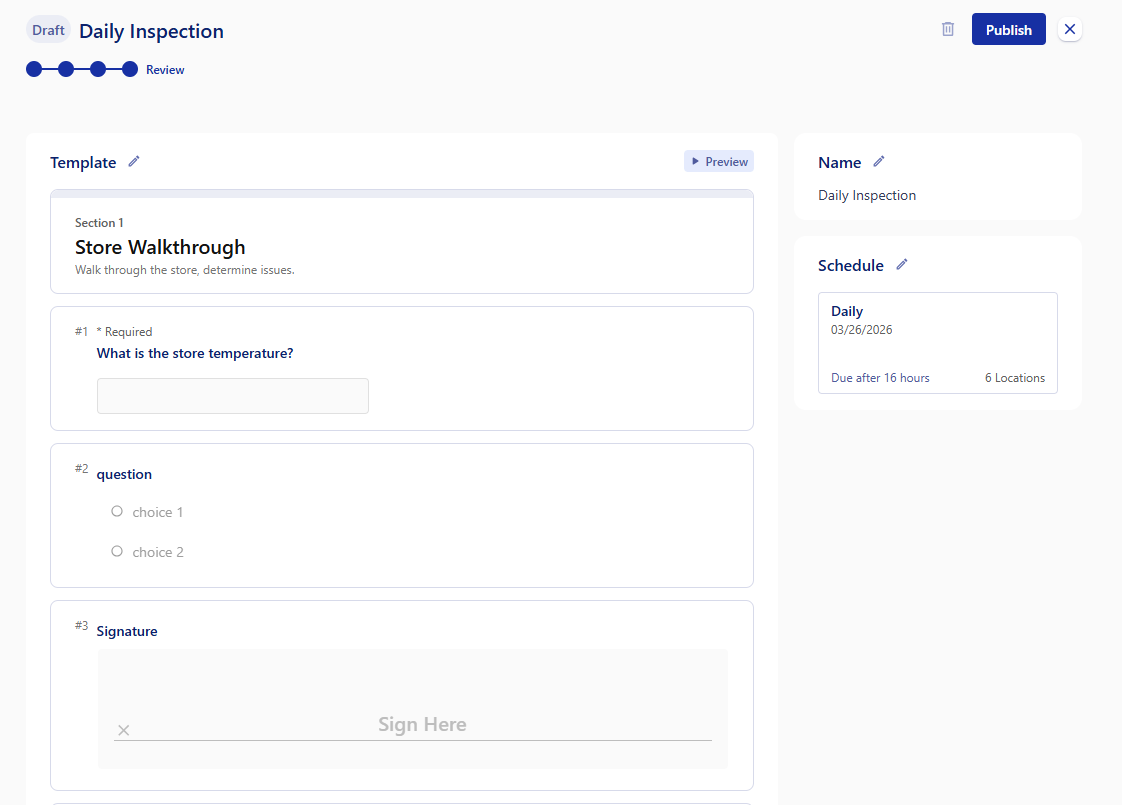
When building your form, you can:
- Add questions in a variety of formats (text, multiple choice, yes/no, numeric, etc.)
- Set questions to appear conditionally based on a previous answer
- Mark questions as required or optional
- Organize questions into sections for longer forms
Conditional Questions
Questions can be configured to show or hide based on how a previous question is answered. For example, if a user answers "No" to an inspection question, a follow-up question asking for details can automatically appear.
This keeps the form clean and relevant for whoever is completing it.
Additional Question Types
During form creation, you can add 'question' sections that have additional functionality to help with tracking the right information.
- Upload photos or documents directly from the form
- Capture a signature from the relevant party before submitting
- Create a work order from within the form. The work order will be linked to the form submission, and the form will be referenced on the work order for full traceability
Editing a Form
Forms can be edited at any time by clicking the pencil icon inside of the form in the form list. When a form is saved after edits, it is published as a new version. The version history allows you to track what changed over time.
Submissions completed on a previous version of a form are retained and remain associated with the version that was active at the time of submission.Assigning and Scheduling Forms/Checklists
A single form can be assigned to multiple locations at once. This generates the form for each location that it is set for, and requires that locations user to fill out the form within the scheduled window.
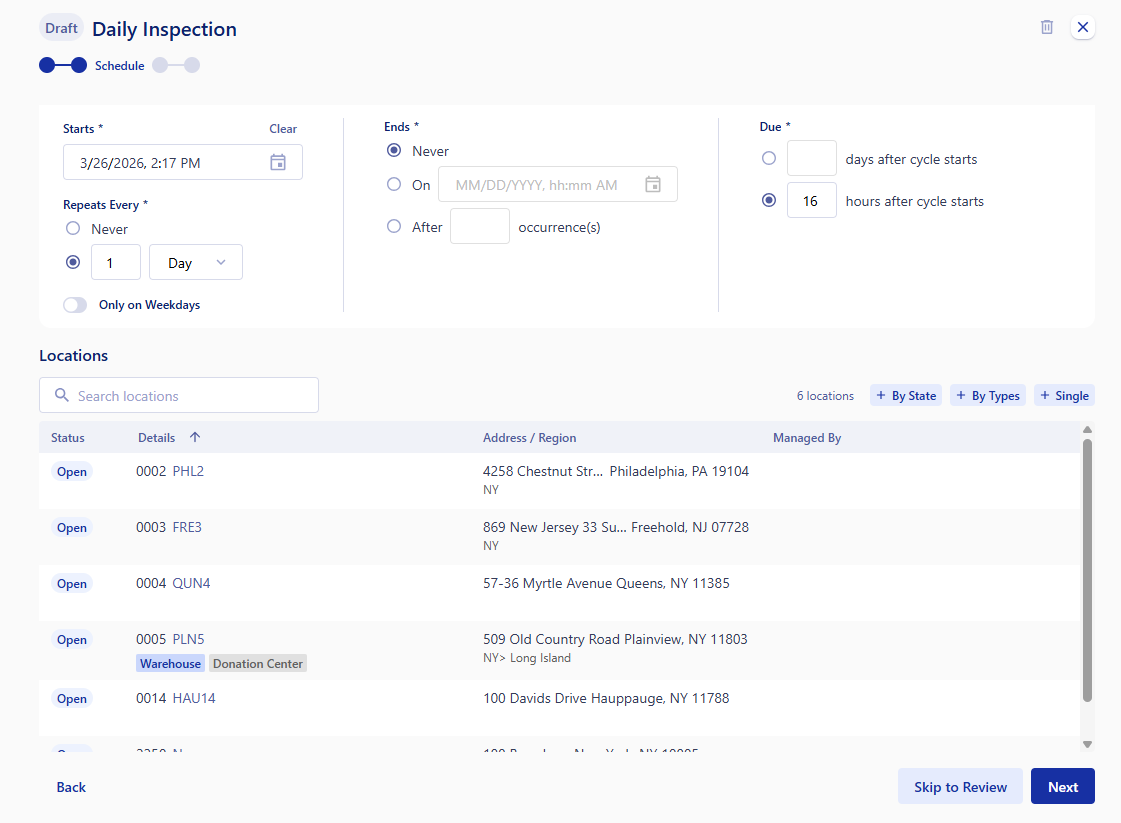
Once assigned, the form can be scheduled for each location with a completion window (a defined start and end time during which the form must be submitted).
Users at each location will see the forms assigned to them within the active completion window in the forms button at the top right of the app. The counter will increase for each form that they have to fill out.
Reporting on Forms
Completed form submissions are collected and reported on the Location Forms page. This allows managers and administrators to review responses, track completion rates, and identify trends or issues across locations.
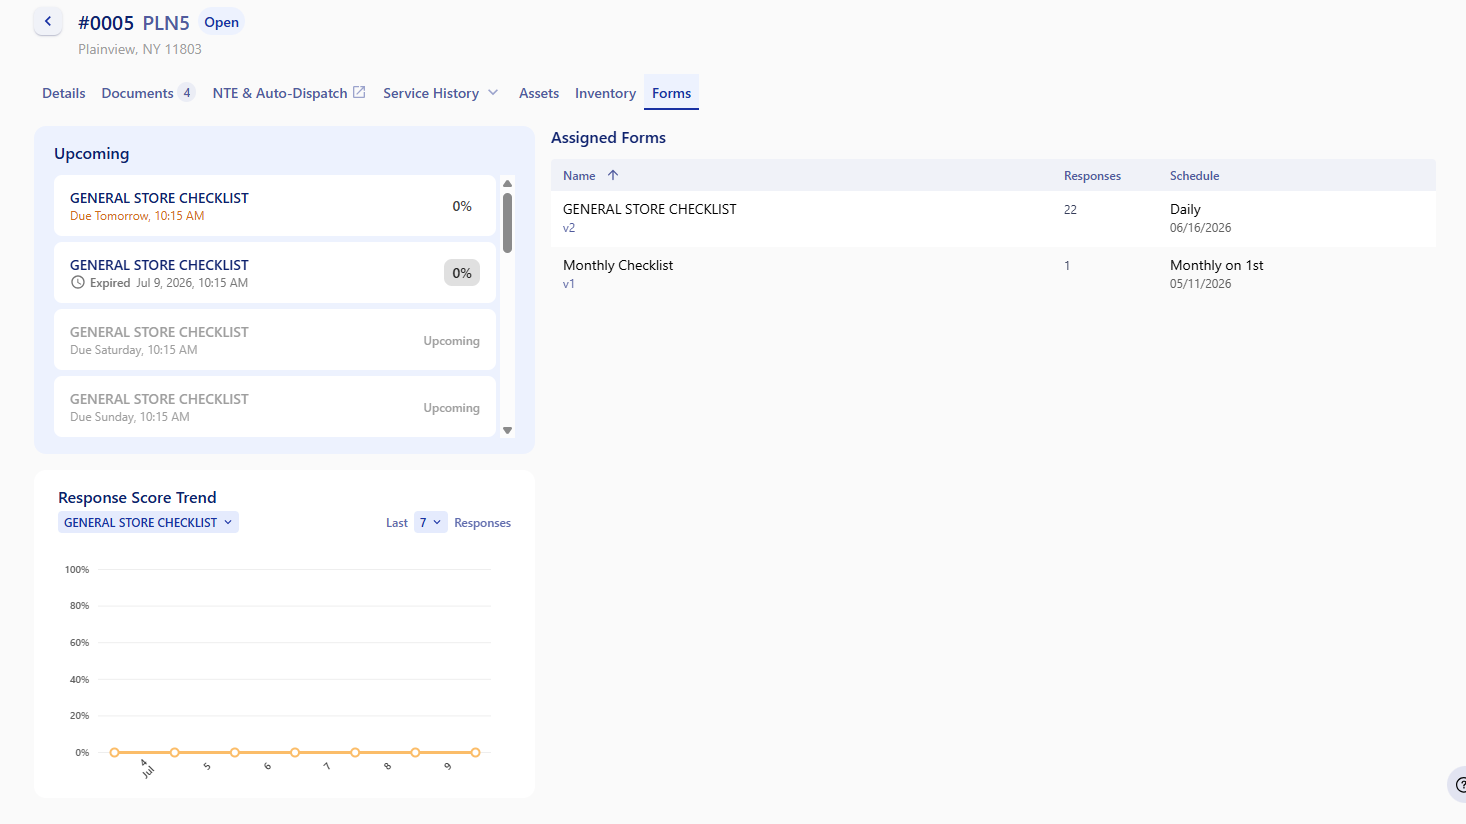
You can filter to show which form you want to report on, and the amount of responses you want to see. This will give you the completion percentage of the forms.
Selecting the Assigned Form on the right will open up the current version of the form, and allow you to see a history of the responses. These responses will span through all iterations of the form that you are viewing.
Was this article helpful?
That’s Great!
Thank you for your feedback
Sorry! We couldn't be helpful
Thank you for your feedback
Feedback sent
We appreciate your effort and will try to fix the article