This page will go over what is in an invoice in Umbrava, and how invoices work in our system.
Invoices are documents that keep record of transactions between a buyer and seller. They are used in Umbrava to send your bill to a client or receive a bill from your vendor.
Invoices can be found in two places, the Work Orders that the invoice was created in, or in the master invoice list in the top navigation bar of Umbrava.
There are two invoice types within the app.
- Vendor Invoices - Invoices that are submitted by the Vendor to the Client
- As a vendor, Vendor invoices are what the client will look for after you submit your Client Invoice.
- A vendor invoice is used to bill you, as typically a vendor invoice will be submitted to your company
- Client Invoices - Invoices that are submitted to the Client by the Vendor.
- Client invoices are created to bill your client for the work that is completed.
- Client invoices are created to bill your client for the work that is completed.
When a vendor submits a Client Invoice to the client, the client receives a Vendor Invoice. The invoice types are directly tied to the relationship of the two parties.
Creating an Invoice
Invoices can be created in a Work Order. To create the invoice, go to the Invoices tab and select the '+' button.
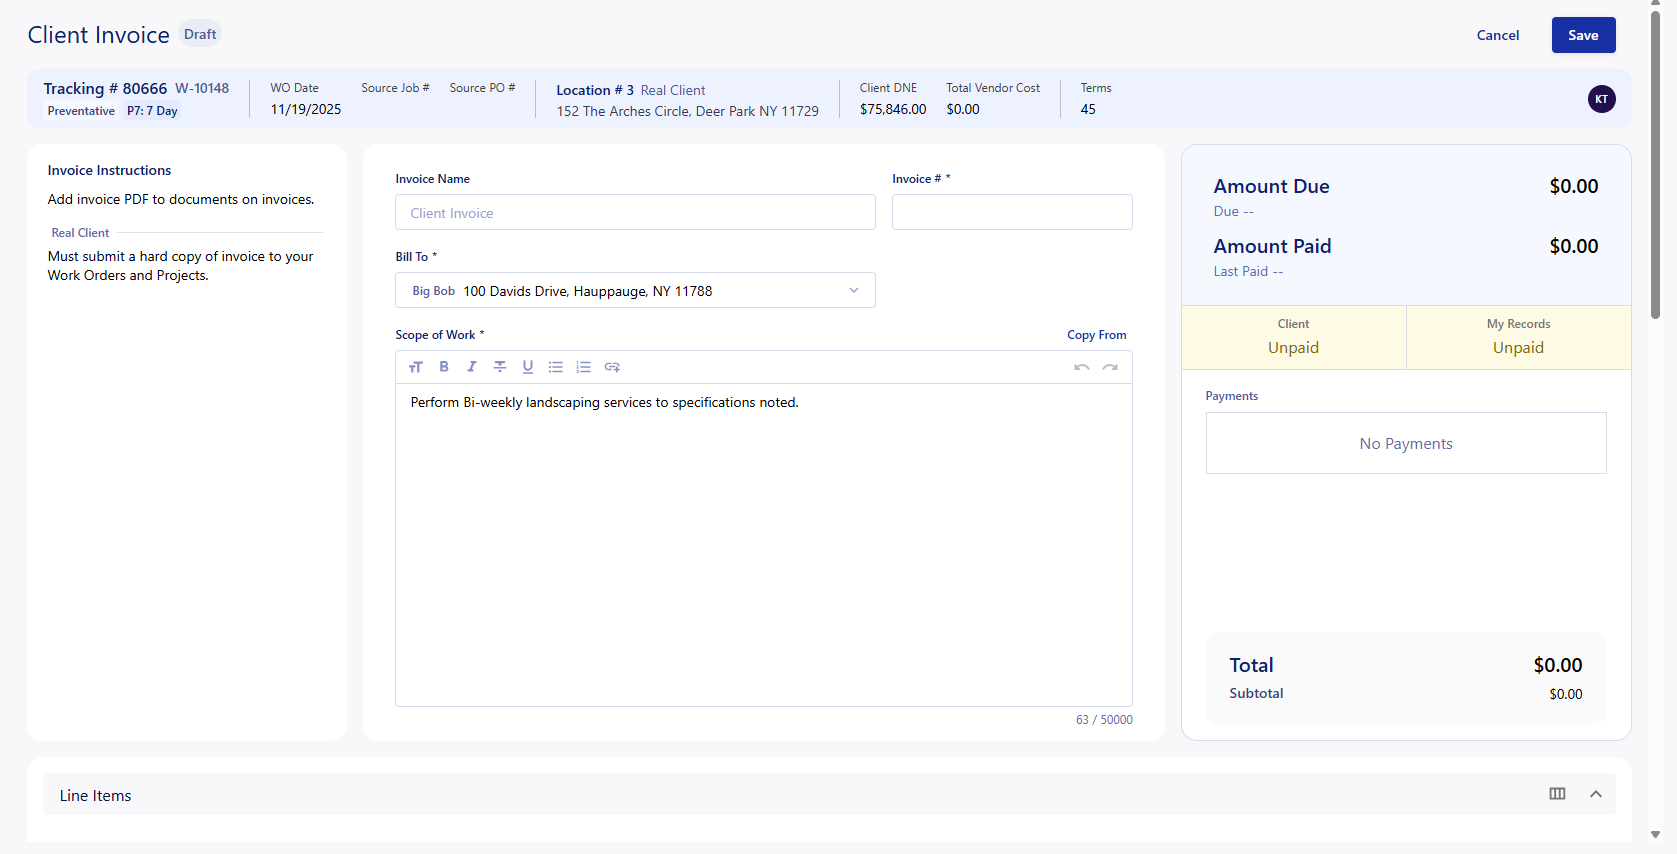
The '+' button opens a draft of an invoice to fill in the information necessary to create an invoice.
- Invoice Name - Becomes the title of the created invoice
- if left blank, the invoice title will auto-generate based on the number of invoices in the work order.
- Invoice # *- Must be input to track invoices.
- Bill To * - This field is to direct the invoice to the proper Billing Contact in the system.
- The Bill To information comes from Billing Contacts that have been set.
- Will autofill if there is only one billing contact.
- The Bill To information comes from Billing Contacts that have been set.
- Status - Can be used to track where an invoice is in its lifecycle.
- Can have Statuses added via the Umbrava team.
- Can have Statuses added via the Umbrava team.
- Scope of Work * - Can be copied from the Scope of Work inside the Work Order
Any field with an asterisk * is a required field.
Another way to create an invoice, is to convert a Client Proposal to a Client Invoice. The context menu in the top right corner of a Client Proposal has the option to 'Convert to Invoice' This invoice will be created with all of the information taken directly from the proposal.
An invoice can also be created by cloning an already existing invoice. This will create another invoice within the Work Order and the cloned invoice will contain all of the same information as the original invoice but will be in the 'Open' state regardless of the state the invoice was cloned from.
The Bill To field not be filled in on conversion, but all line items from the proposal will be created in the invoice.
Invoice Details
The invoice details section holds the information that was input to the invoice on creation in the step above.
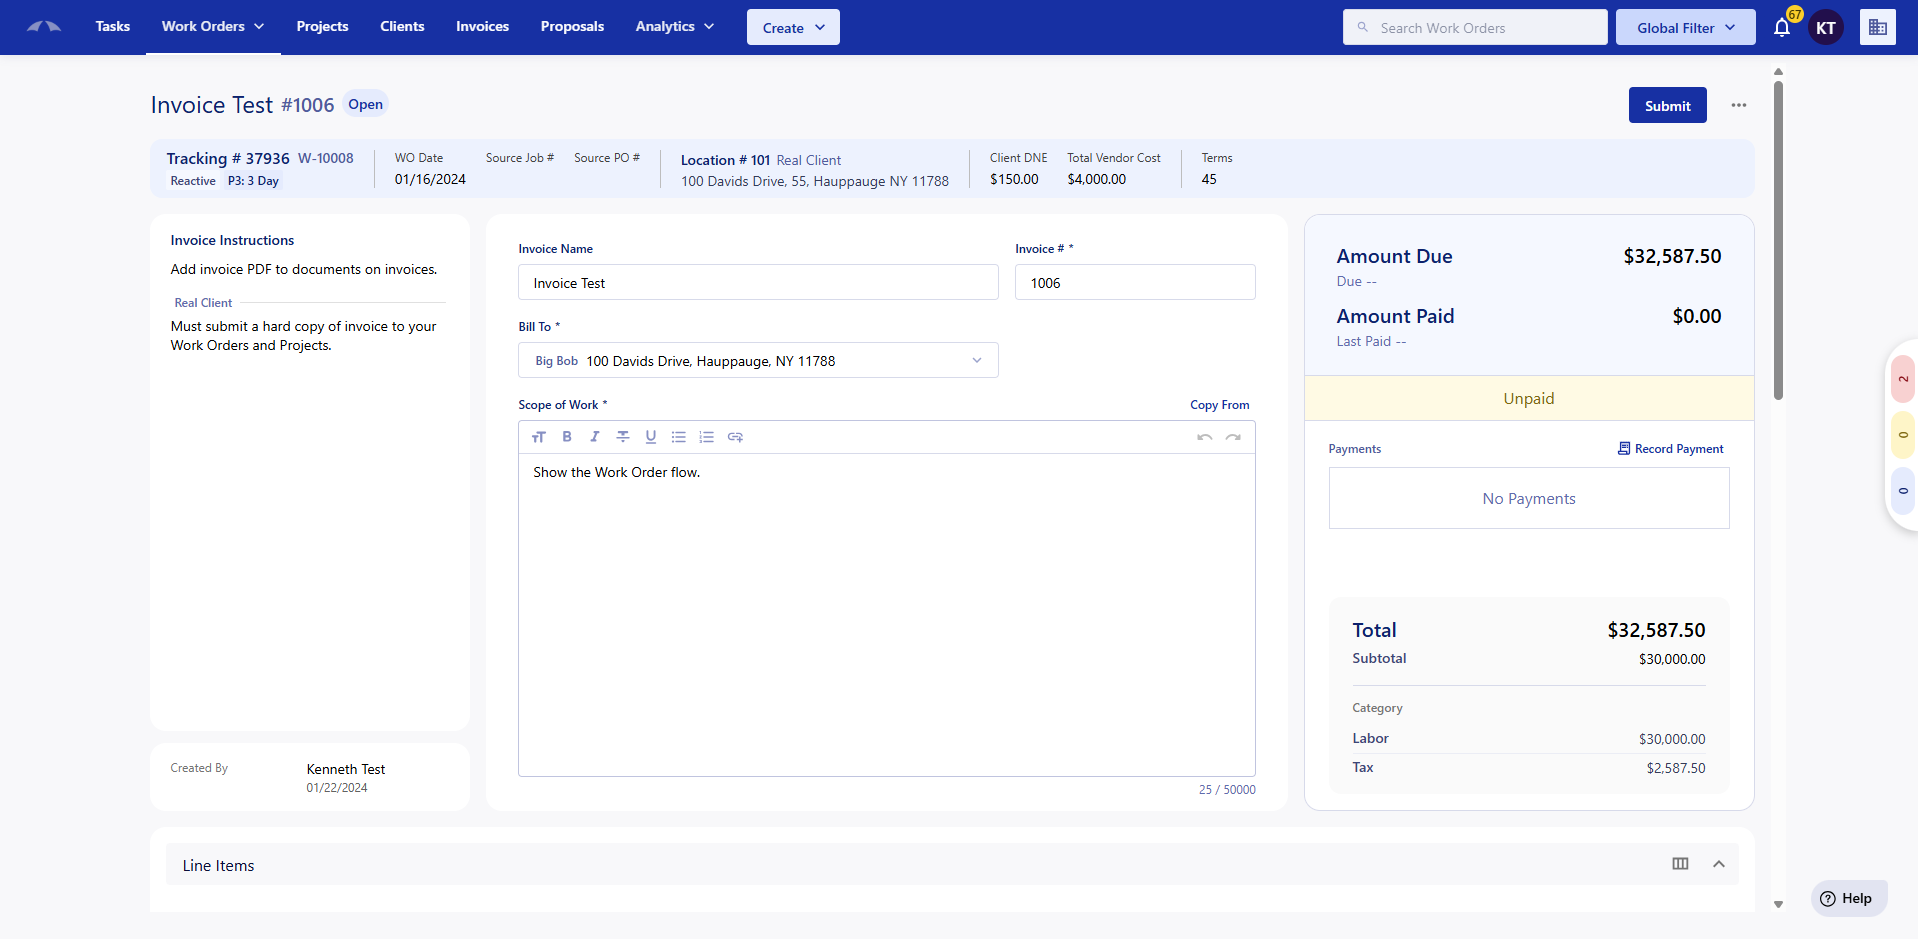
The Invoice title and # are both editable fields that can be accessed by clicking into them.
The Quick Details section contains the following information:
- Client Name
- This can be selected to open the Client Profile in a new window.
- Service Location
- Bill To
- Terms
- Status
Scope of work can be edited to add additional information on the work completed.
The Summary box gives a quick look at the costs/charges associated with the line items which are explained in the next section. The Summary shows the following information:
- Amount Due
- Due Date
- Total Value
- Amount Paid
- Last Paid Date
- Amount already paid
- Breakdown of all costs by Category and Amount
- Labor
- Material
- Travel
- All Other
- Tax
- Invoice Gross Profit
- $ Value
- % of total
Disclaimer at the bottom of the invoice will autofill with the text that has been input at the bottom of the Clients profile under the Invoice Instructions field. The field is editable and can be changed up until the invoice has been submitted.
Invoice Line Items
Line items are what controls the costs/value of an invoice. Line items are used to break down the pricing in a work order. Lets break down what a line item is composed of.

There are 5 sections make up the line items.
- Details
- Cost
- Charge
- Tax
- Total Charge
The Details section holds the explanation of what the line item is, and contains the following:
- Trash Icon
- Deletes the line item
- Deletes the line item
- Reorder icon (6 dots)
- Allows you to click and drag the line item to rearrange the order.
- Allows you to click and drag the line item to rearrange the order.
- Category
- Allows you to allocate what type of charge this line item reflects
- Category affects the tax % based on the location
- Trade
- Select the trade that most pertains to the line item
- Trade affects the tax % based on the location
- Item
- A brief description of what is being charged
- Dropdown will hold all agreed upon items/costs for the selected category/trade
- Selecting an item that has rates will infill the Cost/Charge where applicable
- Has an extended description box that additional details can be input in and reflected on the invoice.
- Trip #
- UOM: Unit of Measurement.
The Cost section is where you can see how much you have spent on each line item, and contains the following:
- Qty: The amount of each line item
- Unit Cost: The value of the individual line item
- Total Cost: Multiplies the Qty and Unit cost
This section is hidden by default in the column chooser, and must be selected in order to show on the line items.
The Charge section is what the vendor is sending to the client to charge them for each line item, and contains the following:
- Qty
- Quantity - the amount of each line item
- Quantity - the amount of each line item
- Mark Up % (Only shows if the cost section is selected from the column chooser.)
- Increases the unit cost by the input % and adds it to the Charge column
- Cannot be input alongside Unit Charge
- Unit Charge
- The value of the individual line item
- Cannot be input alongside Mark Up %
- Subtotal
- Multiplies Qty and Unit Charge
The Tax section is where the tax of each line item is calculated or input. The tax section contains the following:
- Taxable
- Tax %
- Tax Amount
Tax in Umbrava is automatically calculated via TaxJar based on the following criteria:
- Valid Service Location
- Line Item Category
- Line Item Trade
- Line Item Charge
The Total Charge section shows the values of each line item and beneath shows the total cost of the invoice.
The line items of a Vendor Invoice and a Client Invoice are different. The Vendor Invoice does not show the Cost section of the line items so that the client only sees what they are being charged for, and not the profits for the vendor.

Invoice Documents
You can attach any required documentation for invoices directly to your invoice. Documents on the invoice can be added 2 different ways, by attaching documents that have been added to your Work Order documents, or by uploading directly to the invoice.

- Using the 'Attach' button, documents can be added to the invoice using any document that has been added to the Work Order.
- Using the 'Upload' button, new documents can be added to the invoice and Work Order at the same time.
- Archived documents will not be able to be added to the invoice.
- If an archived document is attached to the invoice, it will not be shared when submitting.
The documents can be removed after they have been added by using the 'Remove' button. This will take the selected documents off of the invoice, but they will remain in the Work Order.
Once submitted, the documents will be shared to the client and can no longer added or removed from the Invoice.
Submitting Invoices
Submitting an invoice serves two purposes. First, it submits your bill to your client so you can track payments. Second, it gives you a place to keep track of any invoices that need to be paid to vendors. Once an invoice is submitted, it will no longer be editable and the invoice will be sent to the vendor/client that the invoice is submitted to.
There are 3 ways to submit an invoice. They can be submitted through the Invoice Lists found at the top nav bar. Or the invoices can be submitted in the invoice page for the specific invoice. Inside of the invoice there is a submit button for unsubmitted invoices, and there is a submit option inside of the context menu next to the button.
Umbrava will warn you if the invoice is above the agreed DNE for the client, and will show a warning that the invoice will now be visible for the recipient.

Once submitted, the invoice will go from the 'Open' phase to the 'Submitted' phase. The invoice will no longer be editable.
The invoice 'Submit' button will update to become 'Approve' and 'Reject' buttons if it is a Vendor Invoice, or if the invoice is a Client Invoice and the client is not on Umbrava.
Submitting the invoice will share all of the attached documents to the Client.
Rejected Invoices
When a client rejects your invoice, they will update the state of the invoice, and provide a rejection reason. The rejection reason will be displayed and can be any of the following types:
The client can provide additional description for why it has been rejected.
Need to resubmit an invoice? Use the clone function to recreate your invoice for you!
The invoice can be cloned, and the newly created one can then be submitted with any changes that you make.
Invoice Context Menu
The context menu at the top right of the invoice represented by the (···) holds many actions that can be taken in an invoice.

- View Audit - This option brings up the audit screen, which shows all changes made to the invoice.
- View Job Notes - Opens up the notes that are in the Work Order that the invoice is attached to.
- Clone - Creates a new invoice in the 'Open' state that has all of the same information as the currently selected invoice.
- Download - Downloads the Invoice PDF.
- Send Email - Opens an email modal to send the invoice PDF.
- Payments - Shows any payments made into an invoice and allows you to manually check if an invoice has been paid into.
- Subscription Journal - Opens a log of all integration information pertaining to the invoice.
These actions are broken down in more detail throughout this document.
Payments
The Payments section of the invoice is accessed through the context menu in the top right corner of the invoice. This section is where payments can be manually tracked or can be automatically input if an integration with your ERP/Billing system is set up.

To add a payment, hit the '+ Add New' button and a new line item will generate. You can manually input the amount paid, adjust the date it was paid or make any changes that may be needed. There are 4 types of payments that you can put for each line item in the Payments sections.
- Cash
- Check
- Credit Card
- Other
A memo can be input to add some additional context to the payment if needed.
Subscription Journal
The Subscription Journal is the log of all integration information. Any information that has been captured and sent through your billing integrations, will be relayed through the subscription journal.

If there was an error with the integration being relayed, there is a 'Retry Last' button which will attempt to reconnect with your integration to push the information through and accurately display the payment process for the invoice.
Invoice PDF
To view a PDF of the invoice, go to the invoice and open the context menu. This menu will have a 'Download' option. This will generate a PDF of the invoice that contains all of the same information as the web view. This will save a copy to your download folder.

Was this article helpful?
That’s Great!
Thank you for your feedback
Sorry! We couldn't be helpful
Thank you for your feedback
Feedback sent
We appreciate your effort and will try to fix the article